Please, feel free to contact us via e-mail or by phone on 086 8338845
![]()
Thoughts and discussion on kettlebell training, strength and conditioning, Olympic lifting, fat loss, getting healthy and fit, NMT, core training, Pilates, mobility and anything else that goes with the above.
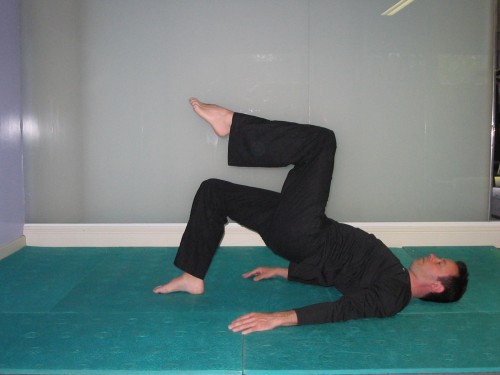
The shoulder bridge is an excellent Pilates movement for releasing your tight spinal muscles, strengthening your core, glutes and abdominals. After mastering our 2 previous movements The 100 and the Roll up you should now be ready to progress to the Shoulder Bridge. Again we will start with some preparation work and then progress it over time. As in all our movements, if you feel pain, stop and consult a physiotherapist about your pain.
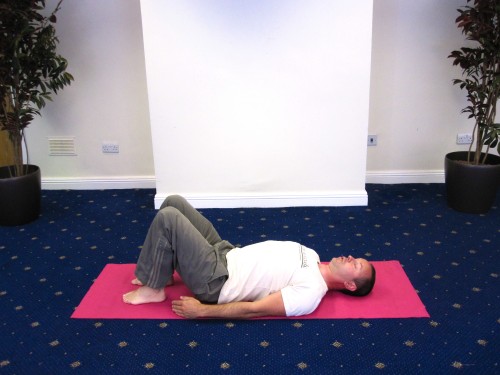
To begin start in the base position above, in neutral spine and centre yourself. Breathe in to prepare and on the exhale tilt your pelvis so that your lower back presses into the mat. We will call this position imprint, like you are trying to make an imprint of your spinal column into the mat. Inhale as your return to neutral and repeat.
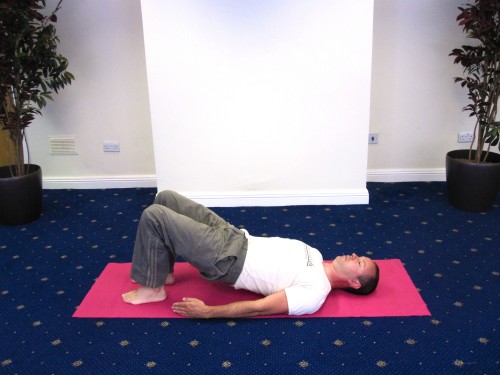
Gradually make the movement bigger, by peeling your spine from the tail bone up, off the floor. Reverse the process on the way down, laying each vertebrae, one at a time, onto the mat with control. Your tail bone should be last onto the mat as you come down. Let your breath dictate the speed of the movement. Try to breath deep and move with control.

Your bridges will start small, just barely lifting your backside off the mat. The bridge will gradually get higher over time. Staying at this low level is a great way to focus on your core contraction and release your tight spinal musculature.
Remember the sequence is pelvic tilt, imprint, peel, on the way up. On the way down, lay the top most vertebrae first, then the next etc. until the tail bone is last onto the mat. Return to neutral and repeat for up to 10 cycles.
NB If you have been diagnosed with Osteoporosis or Osteopenia check with your therapist before doing this movement. You should bridge in neutral, so no pelvic tilt.
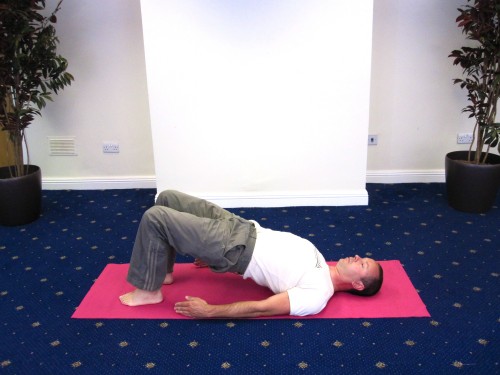
To progress on, from the above. Stop your bridge when you get your hips to the height where you look like a small slide. You should be back in lumbar (lower back) neutral here.

Take an inhale and again tilt your pelvis so that you lay your spine down from the top vertebrae, one by one, to the floor. Imagine your spine to be like a wheel, rolling along the mat from your shoulders to your tail bone. You should return back to neutral spine onto the floor, in preparation for the next inhale and cycle upwards.
Once you have the ability to control your spine one vertebrae at a time up and down to the mat, you can challenge this movement by adding in some arm work.
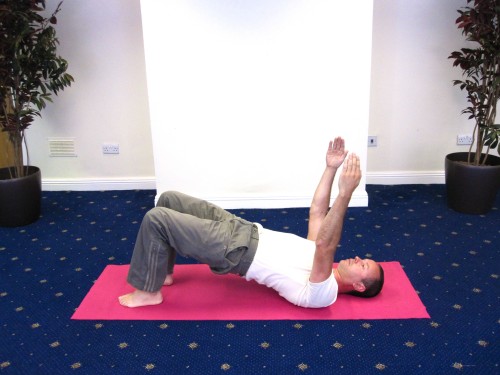
The next time you exhale to the bridge, take an inhale and float both arms up just above your face. Keep your shoulders from shrugging here, so use your Lats and lower Traps to keep your shoulders down.
Keep your arms in this position, as you lay your spine down one vertebrae at a time on the exhale. When you are back to neutral spine on the floor, inhale and lower your arms to the floor outside of your hips.
If you could lay your spine down with good quality, try to bring your arms back a little further to challenge this movement next time and then repeat the same sequence.
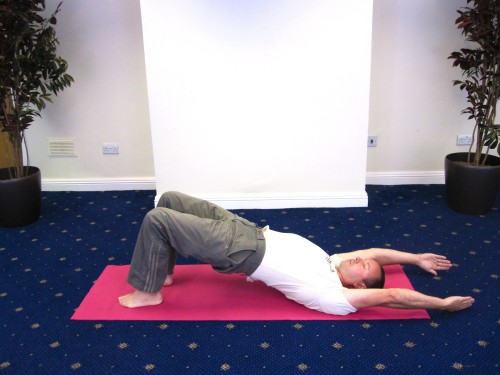
The photo above is what you will be eventually looking for as your top challenge, but progress slowly and be patient. Do up to 10 cycles daily.
Bringing the arms above and behind your face, will try to bring about lower back extension or hyper extension. We are trying to flex the lower back as we return to the floor. So again, this is a great movement for spinal mobility and core strength.
To progress on with this movement. Centre yourself as you come up into the shoulder bridge position on the exhale as before, but keep your arms flat on the ground.
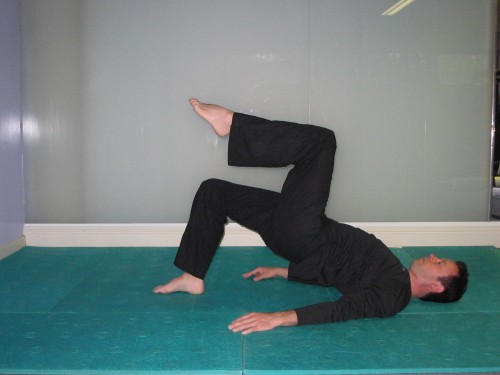
Inhale as you float one leg to the coffee table position. Exshale as you lower it back down to the floor, then repeat this movement on the other side. Ensure you stay centred and avoid dropping your hips.
www.ffireland.com
Copyright ©2025 Function & Fitness Ireland
Designed by Aeronstudio™